#TBT to Chelsea Flower Show 2018

As it’s Thursday, and I didn’t have the time to write about it at the time, here’s my own little summary of the joyous day I spent at RHS Chelsea Flower Show 2018!

20180526-DSC_1272

Me on my first visit to Chelsea Flower Show

This was my first ever visit to the show and it’s fair to say I was excited.  Very excited.  The event lived up to my expectations and I felt awed, inspired, influenced and delighted while I was there.  Although watching the highlights on TV give you a pretty in-depth view of the show gardens and plants, as well as a useful commentary from experts and the designers themselves, there’s nothing like standing right beside that garden and experiencing it for yourself.  Admittedly, you’re sharing that experience with hundreds of other people, all jostling for a good view, but it’s still a great experience.

Of the show gardens, my ultimate favourite was probably the Yorkshire Garden – I just loved its lush cottage garden planting, the stream and the beautiful stone building.  It looked like somewhere I could sit and enjoy for hours (assuming it wasn’t still in the middle of Chelsea and being viewed by thousands of plant-hungry people).

20180526-DSC_1190

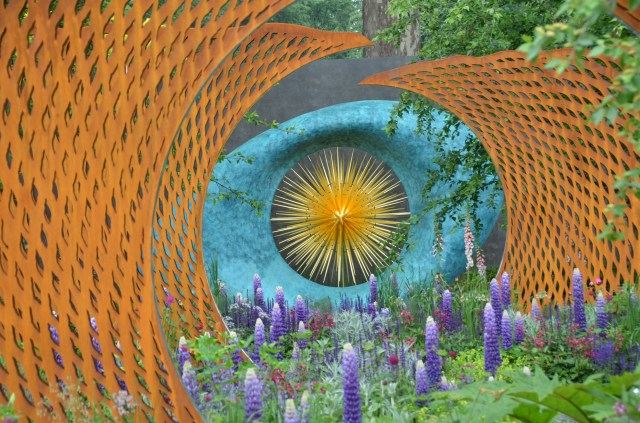
I also loved the artistic creativity of the Harber and Savills Garden – I enjoyed its colours and the view down the line of the garden to the sculpture at its centre.   The one that took me by surprise was the South African Wine Estate, which I expected to feel ambivalent about – in fact I loved the different stages of this garden and the way it captured all the aspects (I assume) of the kind of land it was depicting.

20180526-DSC_1208

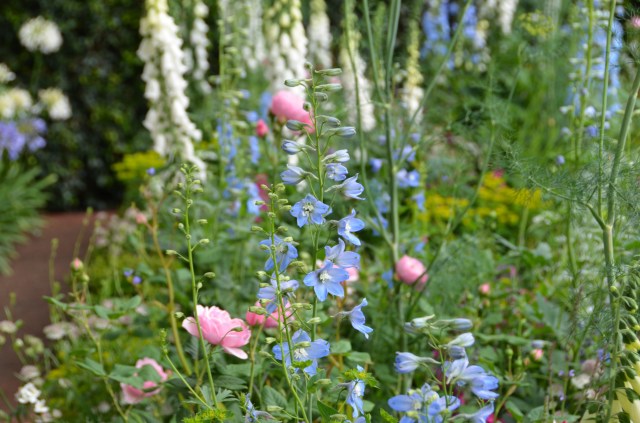
Delphiniums, roses, foxgloves…perfect cottage garden planting

20180526-DSC_1209

Cottage garden section of the South African Wine Estate 

The winner of Best Show Garden was of course Chris Beardshaw’s garden for the NSPCC.  I felt a little underwhelmed by it at the time, but I now wish I could go back and take another look at it again, having read a little more about it.  I think you would also fully appreciate the garden if you were able to get inside it and stand amongst the plants and enjoy the seating spaces.  This is, of course, impossible, but it must give the judges, celebrities and journalists a sense of each garden which we can’t quite achieve observing from the outside.

20180526-DSC_1148

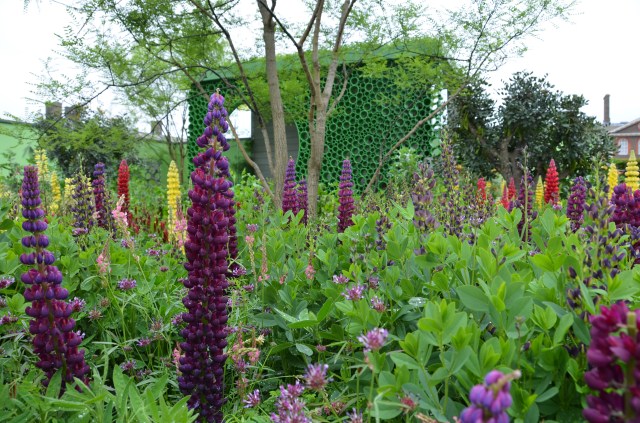
I loved this planting combination – purples, red-purples and zingy greens, with the dark cornflowers popping up in the background

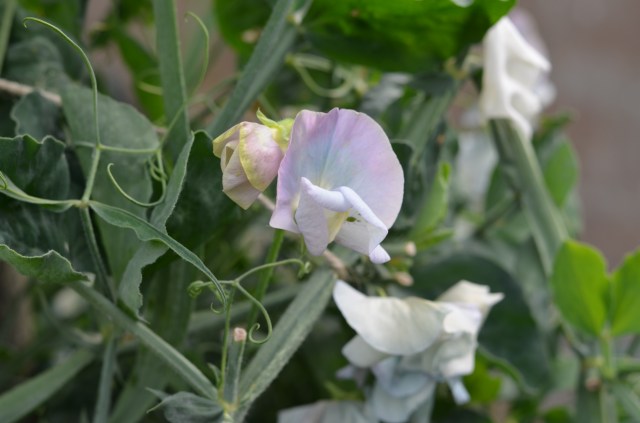
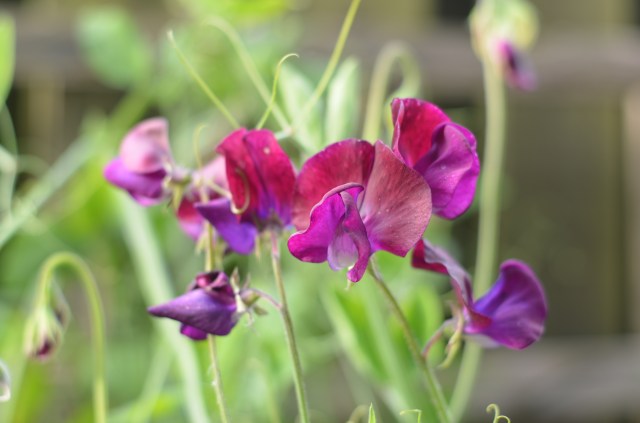
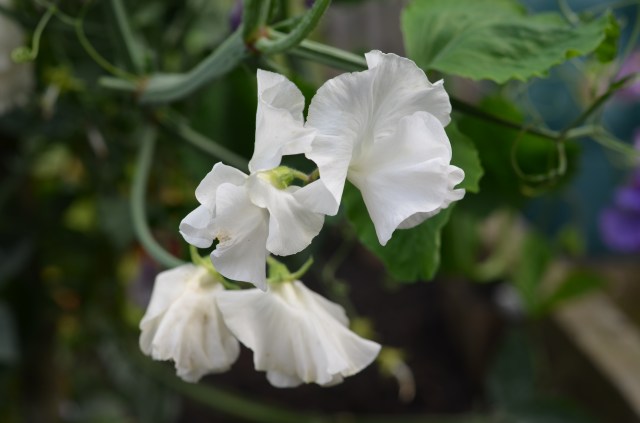
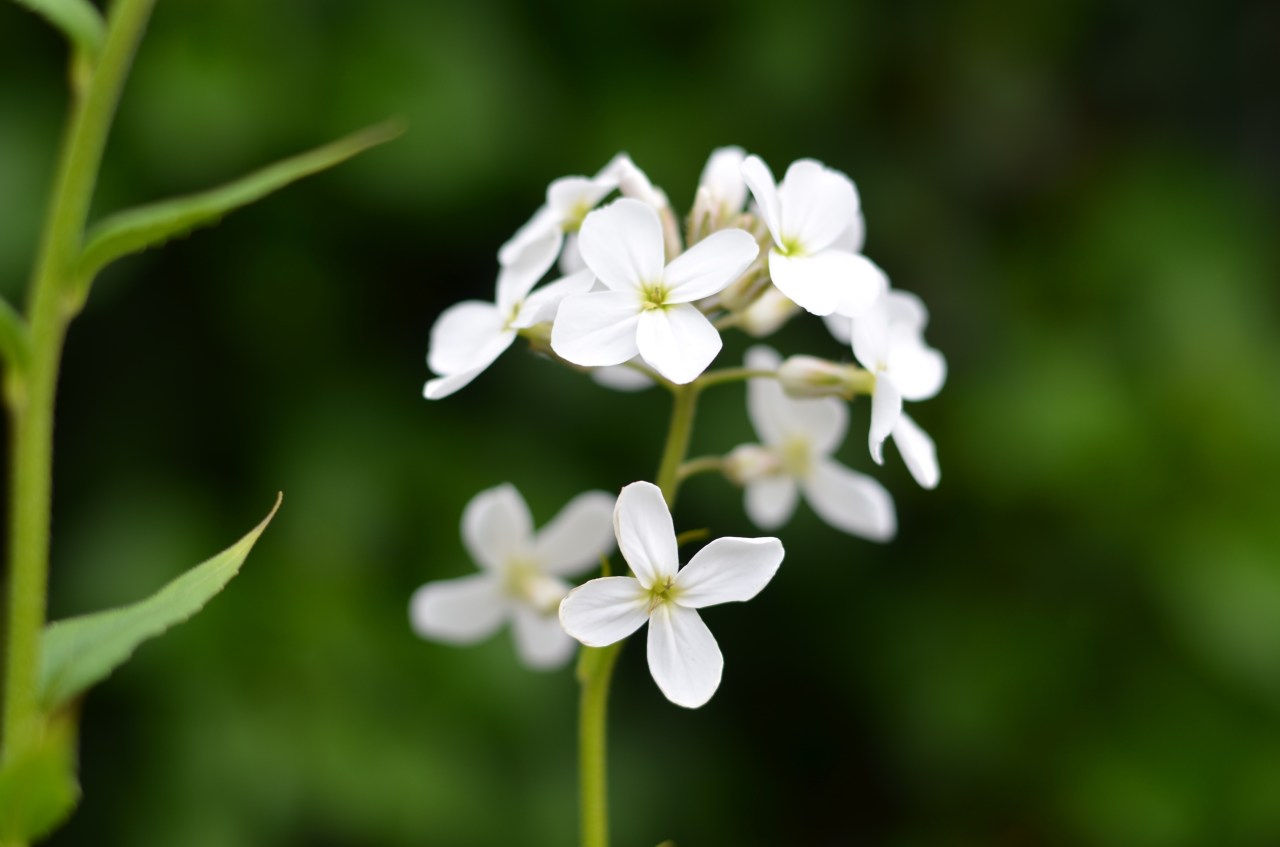
I felt the greatest connection to some of the smaller gardens, however.  The playfulness of the Seedlip Garden was brilliant.  I loved that every plant in it was from the pea family, and yet it was interesting and varied, as well as educational – I never knew there were so many ornamentals in the pea family!   (As a sidenote, if you haven’t tried Seedlip I’d encourage you to do so!  It’s a non-alcoholic spirit and it tastes of the garden.  Lovely with an elderflower tonic.)

20180526-DSC_0974

Lupins and other pea-family planting in the Seedlip Garden.  Note the brilliant pea-villion! 

The Artisan Gardens also impressed me – they also seemed more playful in their creativeness; there was a freedom in these which I imagine the bigger Show Gardens can’t quite access.

Of these, the ones which stood out for me were the Billion Dreams Indian garden with its blue Mecanopsis and gorgeous patterned marble walls; the peaceful and elegant Japanese Hospitality Garden (amazing moss balls!) and the Laced with Hope Garden – this last one reflecting on the journey of a child with cancer.  Its graffiti wall certainly wouldn’t be for everyone but I loved the explosion of colour, which was also reflected in the planting, and the sculptures which I think really illustrated what the garden was trying to achieve.

This slideshow requires JavaScript.


The Great Pavillion was almost overwhelming there were so many flowers and plants on display.  The highlight for me was the The National Dahlia Collection.  So many dahlias on display in one place… I added loads to my wish list but the real inspiration was the planting combinations.  They looked fantastic next to hostas, grasses, foxgloves and aquilegia.  I’m still learning about how and where to grow my dahlias and this was really helpful and interesting.  I will definitely try to combine some of these in my garden in future.

20180526-DSC_1102

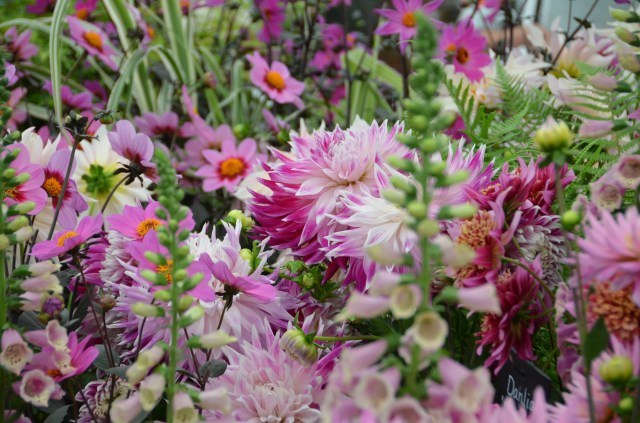
Dahlias planted with foxgloves, grasses, ferns, aquilegia 

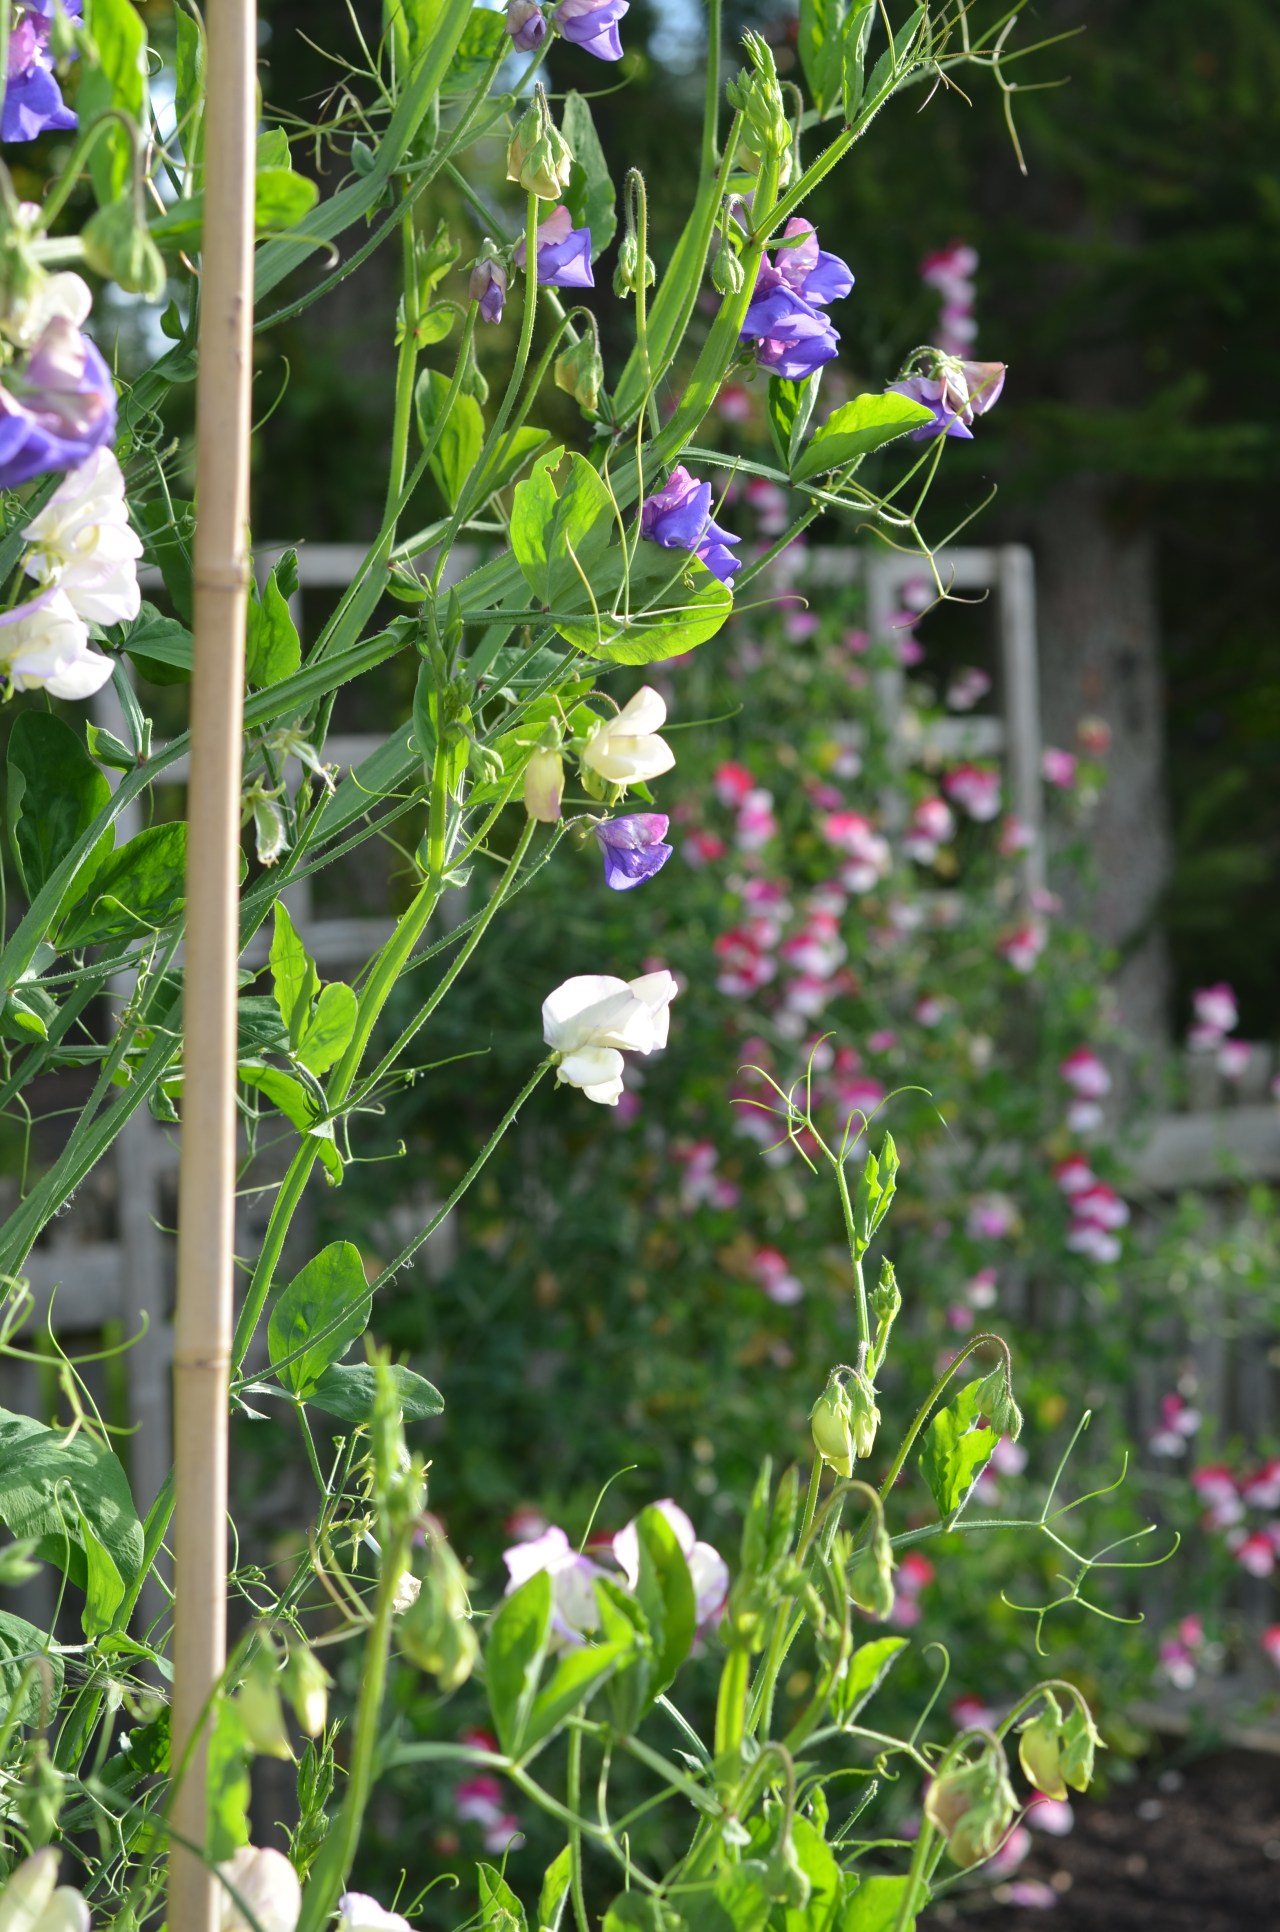
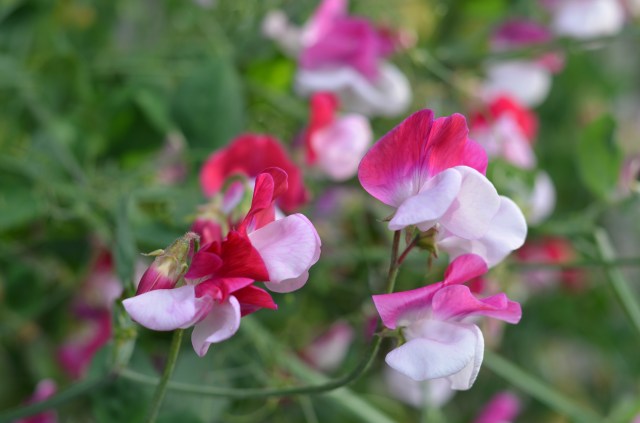
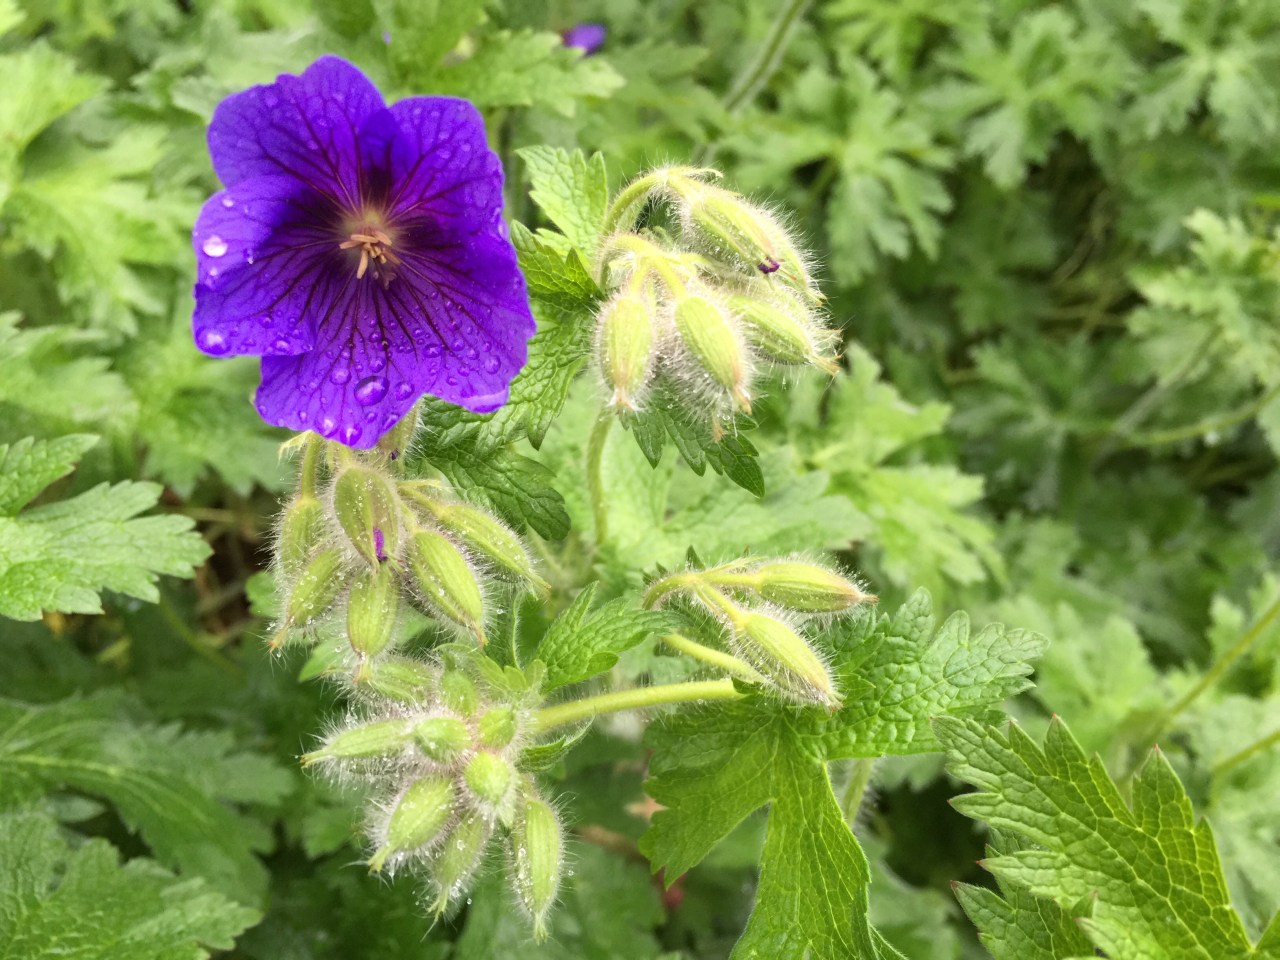
So, what did I take away from Chelsea? Inspiration, ideas and a packet of seeds.  Sweet pea ‘Harlequin’ in fact.  Other stand-out plants which I will now seek out: lupins (especially ‘Masterpiece’), more geums (‘Mai Tai’, ‘Cosmopolitan’) and it’s reaffirmed my desire for some astrantia, having seen a variety of these on show too.

20180526-DSC_1267

Lupin ‘Masterpiece’ and Cerinthe major

20180526-DSC_1151

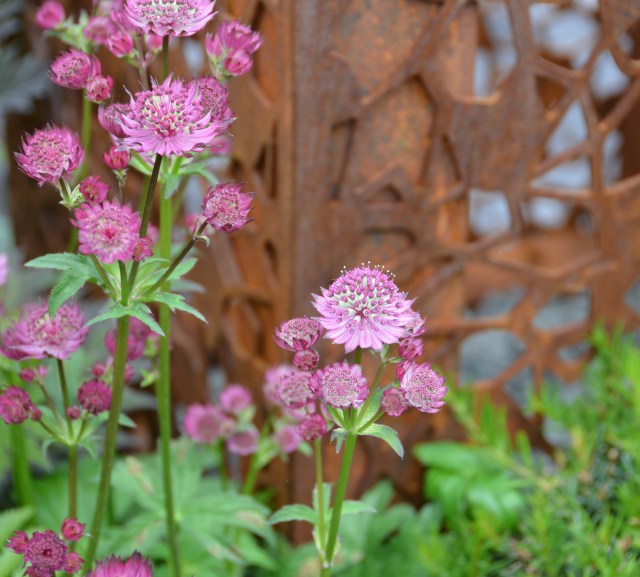
Astrantia – I need some! 

20180526-DSC_1177

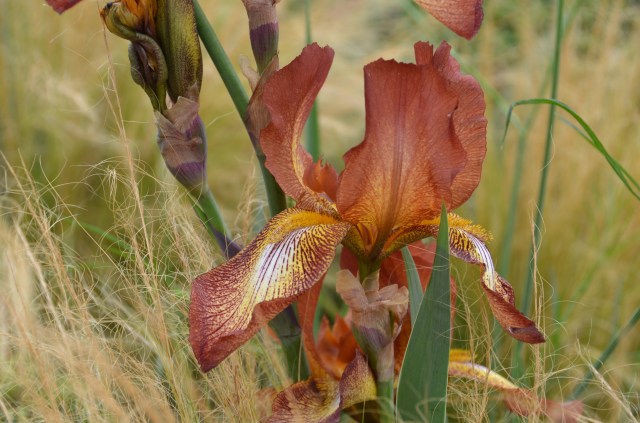
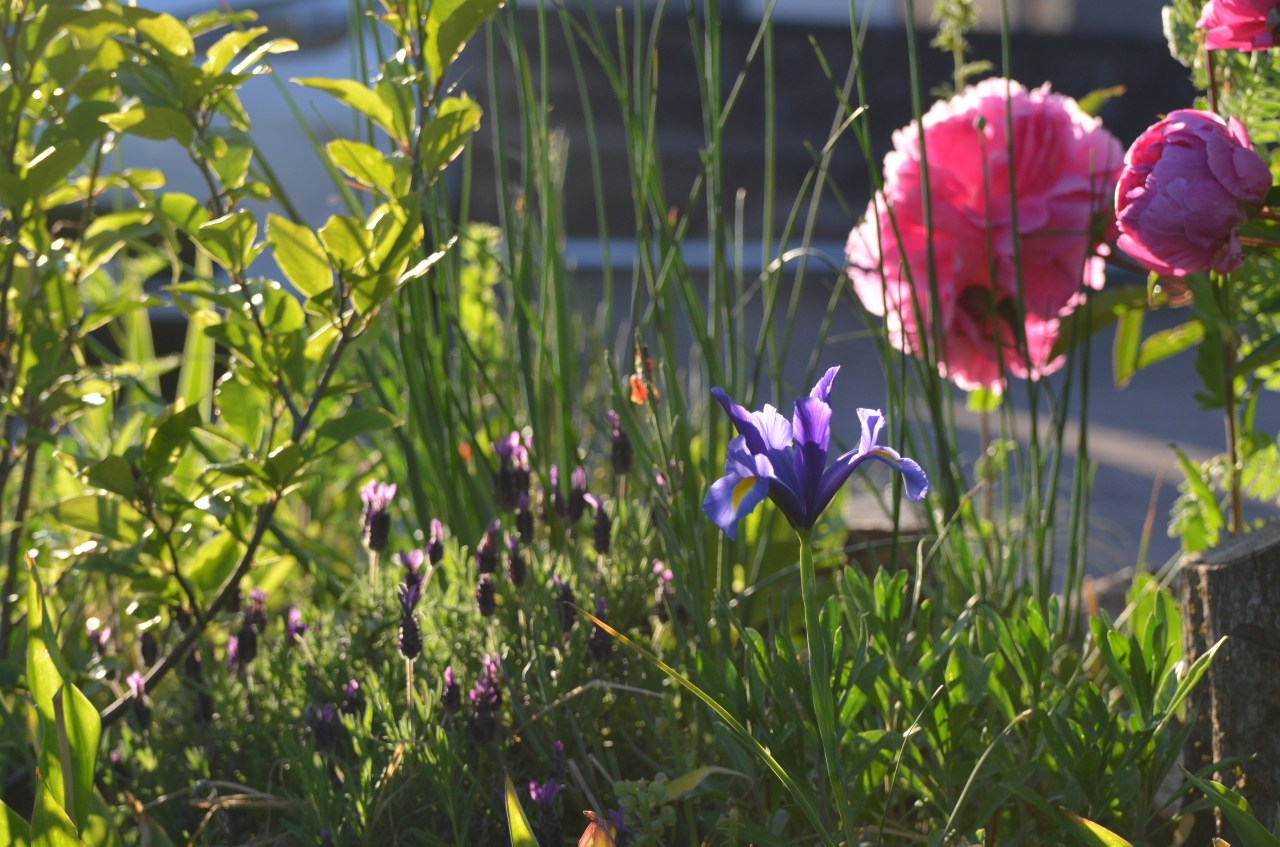
I wasn’t sure about this Iris – until I saw it planted with this straw-coloured grass

I really did love my visit to Chelsea – I felt like I was in Plant Heaven all day, which is how I feel in my own garden, only with extra Pimms and a few more celebrities!  Will I go back?  Yes I think I would – although ideally on a day or time when you could avoid the worst of the crowds.  It’s definitely made me keen to see more of the RHS Shows too – next on the list, Chatsworth… 😉

This slideshow requires JavaScript.


May snapshot

As I suspected, with the coming of Spring is the waning of the blog. However, I would never judge another garden blogger for forsaking screen in favour of soil, so I hope you won’t judge me similarly!

It’s now early June and I want the garden to stay as it is for a little while longer – everything seems to be in bloom at once.  I’m sure it’s a result of the delayed spring which means all the flowers have held back that little bit longer, and instead of appearing sequentially they’re putting on a fantastic show all together.  The laburnum tree in the back is humming with bees and spills over the pink rhodedendron, which is complemented by the dicentra and aquilegia popping up under the shrubs, with the foliage of those yet to bloom – hostas, alchemilla, lupins – filling out the gaps and making it all look quite lush.  And the clematis and honeysuckle are clambering over each other, competing to see who can look the prettiest (clematis wins this contest, but honeysuckle beats her on scent every time).

Yes, I wish I could pause the garden for a bit longer – I can tell it’s about to tip over from fresh and bright and frothy into overgrown and blousy and blown-out.  Not to worry…we might lose the primroses, forget-me-nots and aquilegia but the geraniums and roses are waiting in the wings – not to mention the geums and poppies already putting on a show in the front garden.

The flowers of May have also encouraged me to ramp up my photography – there are so many to capture after a long, cold, colour-free winter!

Here’s a snapshot of the garden last month, which will hopefully serve as a catch-up.

There are plenty more photos of what I’ve been up to in the garden on my Instagram feed @mycorneroftheearth.

This slideshow requires JavaScript.


Spring has sprung…

…and my blog is suffering!  But it’s a good sign – I’m blogging less because I’m spending more time in the garden.  I have to – there are seedlings to prick out, beds to mulch, weeds to weed and plants to pot up.  And it’s only going to get busier from here on in!

Real Life is also getting in the way of Creative Life, as it sometimes does.

The best way to bring you up to speed is perhaps to post a few photographs of some of the garden jobs I’ve been up to in the past month or so…

IMG_2400.jpg

I’ve bought and planted half a dozen Anemone blanda to perk up a bare patch of earth under the magnolia in the back garden

IMG_2367.jpg

I’ve got two plants for my tin-bath pond – a lovely double marsh marigold and a corkscrew rush

IMG_2657.jpg

The forced rhubarb is about ready to pick!


IMG_2629.jpg

I briefly considered starting a sycamore farm – these are all the seedlings germinating at the side of the greenhouse… and there are many, many, many more popping up around the raised beds, paths, plant pots, in between paving stones…

IMG_2046.jpg

I’ve started all my dahlias…and *may* have bought some more along the way… #dahliaaddict

IMG_2406.jpg

Most of my seedlings and young plants are progressing well – some of these I’ve already planted out, like the forget-me-nots, wallflowers and gypsophilia.

IMG_2810.jpg

Basically I am loving the fact that Spring has arrived, bulbs are blooming and the sun is occasionally shining – long may it continue!

It’s the age-old battle for a garden blogger – blog vs garden.

I suspect I will be posting monthly for the forseeable, however I do post much more frequently on Instagram and you can follow me there for some micro-blogging action at @mycorneroftheearth.


Best kit – top 5

Well the weather is still deeply disappointing here.  I look on Instagram and see photos of daffodils, anemones, primroses and even some tomatoes beginning to flower!  And then I look out the window and see grey, brown, damp and a chicken coop slowly turning into s a swimming pool.  I must keep reminding myself that even without the grim wintery weather, our growing season is a good 2-4 weeks behind many other parts of the UK…

While I wait out this particular wintry blast (yep, it’s actually snowing again here) I thought I’d share with you some of by best bits of kit – the gardening tools I love the most or find indespensible.

  1. Thermal gardening gloves. IMG_2058.jpg
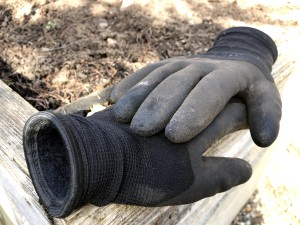
I have quite dry skin and these have been a hand-saver all winter – I’m still using them now while the weather is still a bit on the nippy side.  They’re lined with soft, cosy material and genuinely keep my fingers warm.  This makes them a bit thicker so they’re not ideal for fiddly jobs but for general digging, moving, lifting bags of compost or whatever they’re great and fairly waterproof too so your hands don’t freeze off when the hose drips all over the place.
  2. Wooden tools.IMG_2189.jpg 
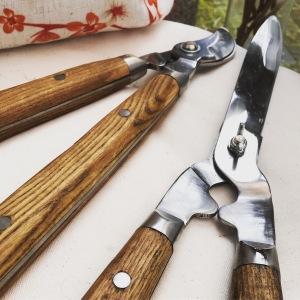
I love these mainly because they’re a thing of beauty.  I am drawn to certain materials – wood, corduroy and I’m a total sucker for tan leather.  I love these so much I bought matching loppers and shears.  I wish I could say I have a set of well-loved wooden-handled tools handed down by a relative or the head gardener of a huge estate, but these were simply bargains in TK Maxx!  They may not have the heritage but they look wonderful and I feel like I will care for them more because of it.  Hand tools tend to end up a bit rusty and rickety for me – I will confess I don’t usually clean and sharpen them regularly the way you’re supposed to.  These look so simple and refined it’ll be easy to give them a wipe down or sharpen them up – I’m sure of it!
  3. Propagator IMG_0729.jpg 
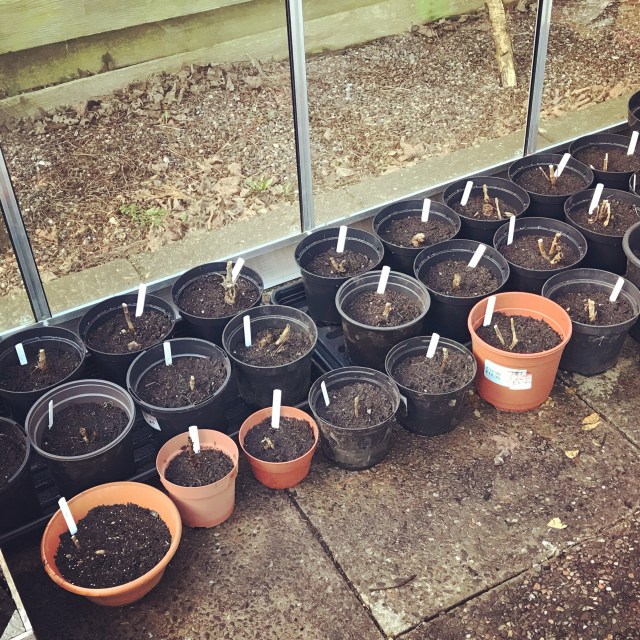
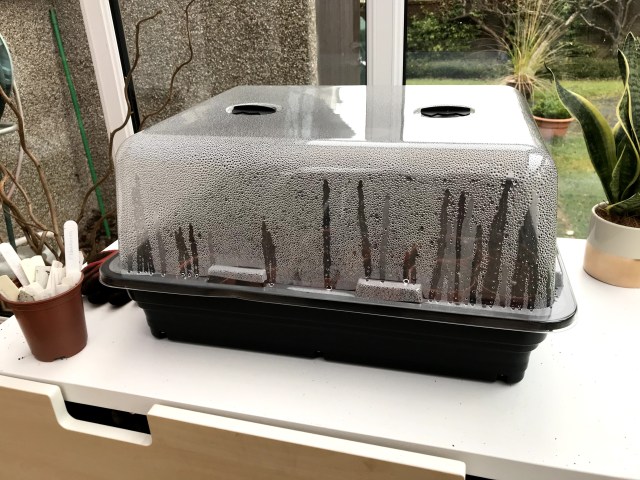
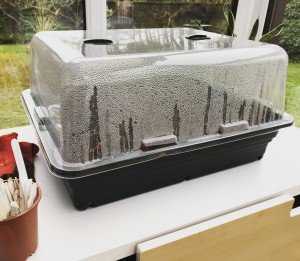
This model is a 52 cm Stewart Essentials electric propagator which I picked up for just over £20 during the last Black Friday sale.  It’s not thermostatically controlled but as I use the rear sun room as a sort of indoor greenhouse it keeps my seeds at a good temperature for germination in a room where the temperature can fluctuate quite a lot, especially at night when it’s pretty cold.  I am currently trying to germinate my pelargonium seeds in there and they’re taking AGES.  I’ve also have very limited success with astrantia – only two seedlings so far.  But I think this is down to my choice of tricky-to-grow plants rather than the propagator!  I’m not very patient and need the space in that propagator for other seeds so I think I will very soon cut my losses and move these out in favour of something that will grow much easier.
  4. Boots. IMG_2037.jpg These are my beloved and very scruffy gardening boots.  I’ve had them for years, they’re still reasonably comfy but not very waterproof.  However when I’m wearing them I feel in ‘gardening mode’ – I feel like I can dig and sow and weed and do garden-y things because I’m in my Gardening Boots.
  5. iphone.  Truly indespensible in the garden for me.  Obviously it’s useful if anyone needs to get hold of me, I also take photos to post to my Instagram feed, check sowing times or names of plants, or for various bits of gardening advice if I come across something I’m unsure about.  IMG_2191.png
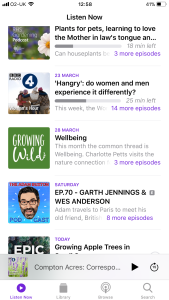
I also really love to listen to podcasts while I’m in the garden or greenhouse, and my podcast library is rapidly expanding – everything from Gardeners’ Question Time to Womens Hour to Adam Buxton to On The Ledge.  I’ve added quite a few more gardening podcasts recently, including this new one from Andrew O’Brien and Laeticia Maklouf.  I find them so useful and interesting – I like to absorb more garden knowledge through my ears and into my brain as I’m getting my hands dirty in the soil!

Back garden planning…

It’s time to concentrate on the back garden for a while.

IMG_1528.jpg

View of the back garden.  Obviously, it’s not normally covered in snow…

I’ve been turning my attention to planning the front borders up until now because there’s just so much bare soil out there.   I now have this space three-quarters planned – there’s just one corner I’m not exactly sure what I’ll do with yet.  I’ve moved most of the shrubs I want to move and even binned a couple which have outlived their usefulness.  Now it’s a case of waiting for everything to grow; most of the herbaceous perennials or annuals I want to plant in the front I will grow from seed.  This is probably ambitious, to say the least, but I simply couldn’t afford to go into a garden centre and buy everything I’ll need to fill the front garden, and I kind of want the satisfaction of knowing I’ve created much of it myself, from seed.   Don’t get me wrong – I have bought and will continue to pick up bits and pieces along the way, especially if I spy bargains at a plant sale or special offer.  But I’m trying my best to grow most of it, and that process is already underway.

So, with spring fast approaching, it’s time to look again at the rear garden.  There’s plenty of bare soil here too and I want to take a different approach with this area.    I have had the idea of woodland planting for the back garden for a while, as it tends to be more shady and there are a lot of mature, established shrubs and conifers.  This was confirmed on a visit to Belfast Botanic Garden in late spring last year when much of the planting which caught my eye was lovely lush, untamed woodland-style planting and I was inspired by many of the combinations – pulmonaria and geraniums, ferns and tiarella, hostas and hellebores, planted alongside rhodedendrons, pieris and euphorbia.  It struck me that I have the basis of this kind of planting already and want to keep the theme going.

IMG_1358.jpg

Ferns and pulmonaria at Belfast’s Botanic Garden

There are other criteria for the back garden: I would also like it to more or less take care of itself, I’m happy with a slightly ‘wild’ look and the plants will also need to be fairly tough as the chickens are free-ranging out there regularly now and love to scratch about in these borders and take dust baths in the driest spots.

Colour-wise, everything that’s out there already is purple, pink or white and that’s a theme I quite like and will continue – with the exception of wild primroses.  I really want these, as they are perfect woodland plants, will spread and provide early spring colour.  I hope their soft yellow shade will be a nice contrast for other planting in this area.

The plants which already shine in the back garden are geraniums, hostas, aquilegia and some alchemilla mollis which I have to keep an eye on or it would take over.  There are quite a few Fritilliaria melleagris (snakes head fritillaries) which will soon be emerging I hope and I’m also watching for the hellebores to make an appearance.    Last year I also added some white Hesperis matronalis (sweet rocket) which I really like and some Japanese anemones – I hope these will settle in and spread around the back and in between the larger shrubs.

So, the planting is already fairly ‘woodland’ or ‘wildflower’ in theme and I want to continue that, adding some sturdy specimens which will provide more colour for more of the year, and preferably ground cover too.

I’ve made a start – my local garden centre had an offer on pulmonaria this weekend, so I’ve picked up three ‘Raspberry Splash’.  These have lovely silvery-variegated leaves and are a pink-red colour which I like as an alternative to the more common purple variety.  They’re quite large so I’m pleased that they’ve already filled quite a good-sized gap.  I also spied primula vulgaris, which I’ve been hankering after and got half a dozen to plant at the front of the border.  They’re not in flower yet but I really hope they’ll establish and provide a very welcome spot of early colour.

Here’s how it’s looking now they’re in place:

IMG_1506.jpg

Obviously, still quite a lot of soil on show, but as we know, gardening is about playing the long game, and I’m hopeful these young plants will establish and spread over time.  I expect I may still have to use some annuals or bedding plants to fill in the gaps for a year or two but that’s fine with me.  In fact, I have a plenty of forget me nots grown from seed which will need a home and I think they will work nicely here too.  The other plant I want for the back garden is tiarella – I think the frothy white spires will provide a nice contrast to some of the other plants and, again, should provide some good ground cover in time.

IMG_1355.jpg

Tiarella at Belfast’s Botanic Garden – I love the fresh green leaves of this variety

So watch this space – I certainly am!  I’m checking almost every day for the little green shoots of bulbs, hostas and other perennials emerging in this part of the garden and I’m looking forward to creating a little bit of Belfast Botanic Garden which I can see from my kitchen window.


Garden visit: Cambo Estate

This is the perfect time of year to visit Cambo Estate in Fife, when it hosts its annual snowdrop festival.

I make a point of going each winter/spring because there’s no better way to lift you out of the winter doldrums than gazing at hundreds of snowdrops.  And there are, literally, hundreds of snowdrops at Cambo.  There are 350 different varieties on display in the gardens and around 70 acres of woods, carpetted with snowdrops and aconites.

DSC_0845

Not only that but the grounds of Cambo Country House also include a walled garden, prairie planting, beds of winter interest planting and piglets!

In winter the walled garden is full of grasses and seedheads, with sculptures dotted around, a huge weeping willow over a stream, a pergola and glasshouses with specimens of succulents and pelargoniums.  It’s one of my favourite places to be and I’ve promised myself to go back in the summer so that I can see how different it looks at that time of year.  I love it in winter so can’t wait to see what impact it has full of flowers and greenery.

This slideshow requires JavaScript.

The garden isn’t all brown seedheads and straw coloured feathery grasses…check out this dogwood – no filter or post-processing for this image!

20180217-DSC_0996

BLAM.  They also had some Cornus ‘Midwinter Fire’ which I may have coveted for my own garden…20180217-DSC_0993.jpg

And another hit of colour in the glasshouse…20180217-DSC_0980

One of the highlights of the visit at this time of year is the large daphne planted at the rear of the house.  You can smell it before you see it…follow your nose and you’re rewarded by the most beautiful scent.  Daphnes can be tricky plants to grow, liking only specific conditions – well, this one must be very happy because its flowers this year are prolific and the fragrance is amazing.

IMG_1427.jpg

The snowdrops which caught my eye this year had a touch of yellow to them:

20180217-DSC_0002

These may have been ‘Hippolyta’ although I admit I forgot to snap a picture of the label to remind me. However I did get a photo of  ‘Lady Elphinstone’ as she was another favourite.

I didn’t allow myself to fall completely in love with snowdrops…as galanthophiles will tell you, it can be an expensive obsession, with some single snowdrops selling at Cambo’s visitors centre for as much as £20.  However I did manage to come home with a small clump of doubles which I’ve planted ‘in the green’ under the magnolia bush in the back garden.  I hope they’ll thrive and multiply so that I can enjoy a little corner of Cambo in my own garden.

20180217-DSC_0001


Witch Hazel

20180125-DSC_0710

I take photos of the witch hazel every year when it blooms.  I think it’s because I’m just so glad to see some colour in the garden.  This bush shines like a little beacon in the darkest corner of the garden, close to the compost bin, and I don’t always notice it straight away, but when I do it makes me feel really happy.  Those delicate yellow ribbons are a sign that there’s much more to come…Spring is on her way.

Chickening out

I’m a bit feather-brained at the moment.

We have three chickens – Minnie, Polly and Iona – they’re our first little flock and we’re extremely fond of them.  I have previously documented their arrival here and since we got them they seem to be quite happy in our back garden.  They’ve recently started laying again after a bit of a break over Christmas time and their eggs are delicious.  My current favourite lunch is poached egg and avocado on a nice bit of thick bread, with a good cup of tea.  YUM.

Our hens live in the middle of a back border in a second-hand Eglu (thank you, Gumtree) and have a small run outside of the main coop and wire run.  We have experimented with free-ranging before, but for various reasons I have always gone back to restricting them to their bigger run and keeping them out of the main garden.

The reasons included – bird flu restrictions (the advice was to keep them under cover and away from wild birds for several weeks), poo on the grass and paths, fears they would eat some of my plants – plus one of them worked out how to escape and, having had a taste of freedom, would get out at inconvenient times.

However, I recently bought and read this book…

IMG_1085.jpg

…which has reminded me of my original hopes when we got the hens – that they would be an important and valuable element of our garden, not destroying it but contributing to it.

This book has been around for while, it’s not a new release, but it’s still very relevant.  The author, Jessi Bloom, is an experienced chicken owner and writes with passion and enthusiasm about how easy it is to integrate chickens and gardens.  She gives advice about housing, planting, training and looking after hens.

The main message I took away from reading this book are that chickens can not just live in your garden, but can actually be beneficial too – I already compost their poo so that the nutrients will return to the soil, but the book also made it clear that hens can reduce pests and weeds and be useful garden helpers.

It’s helped to calm my fears about letting the hens loose.  If there are young plants you don’t want them to eat, these can be protected.  Yes, there may be occasional damage but it’s avoidable and not a great tragedy if it does occur.  Let’s face it, the nature of gardening is such that if something doesn’t work the first time, you can simply try again.  And yes there may be some poo on the grass but at this time of year it’s not a big issue and a quick sweep of the lawn in the spring/summer should see it clear for the kids to play on.  In fact, I might even get them to do the poo-picking!

And so, our ladies have been released.  They are free-ranging part-time (afternoons, when we’re home to keep an eye on them) and seem to be loving it.  They’ve already established the New Favourite Dust Bathing Area – under a conifer I recently clipped so that the hellebores underneath would have a bit more breathing space.

I do have plans to introduce new plants to the back garden but now I’ll be more mindful of how to protect these until they’re established.  I feel more comfortable that what’s already there will survive a small amount of treading or scraping and if it doesn’t, well, it can be replaced.

This back garden area will eventually be an area of woodland planting – tough, hardy, resilient to a bit of ‘chicken love’, and I hope they really will keep the pests down and the weeds at bay.  For now, I’m enjoying seeing them run across the garden, wings outstretched, or run up to me hoping for treats and just kicking about making their little ‘boop-boop’ noises.  They’re good garden companions.

In fact, they’re so good that I’m now keeping my eyes peeled for a second coop – either for raising chicks or for a new flock.  I was warned that chicken-keeping becomes addictive and it’s true.  Hence why I’m feather-brained – I keep wondering if it should be Pekins, bantams, ex-batts, Auraucanas, Buffs….


A total redesign

These are scary words!  A TOTAL REDESIGN of the front garden.  This means digging, moving, sowing, replanting, more digging, weeding, propagating… I can’t wait.

We’ve lived here for three years now and I have tweaked the front garden only slightly each year.  It’s been good to wait and live with the garden for a while.  To see what thrives and what doesn’t; what I look forward to seeing each year and what bores me.  I’ve added bulbs for spring colour and a number of roses.  I’ve hauled out a couple of shrubs which did nothing for me or the garden, and experimented with adding a few annuals and perennials.   It’s a very mature ‘shrubby’ garden – there are several rhodedendrons and azaleas, a skimmia and a couple of handsome continus, for example.  And while many of these plants do very well and have their moments throughout the season I want to introduce interest right through from spring to autumn.

Last year saw the biggest change and I chose a section beside the driveway to add more planting than ever – mostly herbaceous perennials and a couple of new roses and shrubs.  And even though I didn’t really plan it properly and added things ad-hoc, perhaps slightly haphazardly and sometimes just to fill gaps…it looked great!  It gave me a vision for how the whole of the garden could look and made me realise that cottage garden style planting is the way forward.  For this particular section of the border I was attracted to echinaceas, lavender, roses, hollyhocks, geums, more roses, salvias and gypsophila.  Soft colour, blousy petals, frothy flowers were held together by showy dahlias and some good old-fashioned roses.  I enjoyed the colour, the scent, the fact that there was always something in flower to enjoy and that the seedheads and stems are there to keep things interesting even now, in the middle of winter.

So – a cottage garden it is.  And the planning is underway…

Now, I am not a designer – I’m not even a particularly good artist so please forgive the slightly scrappy drawings, but I’m loving sketching out plans for what should go where and creating ‘mood boards’ to give me a clear idea of the kinds of plants I want to grow and plant.  I’ve even gone into Full Organisation Mode, using spreadsheets to keep track of what seeds I have, when to sow them and to keep a record of what I’ve grown as I go along this year.

IMG_0567.jpg

I’ll be honest – I’m not normally this organised, and you don’t have to do this to be a ‘good gardener’.  Up until now I’ve had a pretty relaxed ‘it’ll grow when it grows’ attitude to what I’ve sown and planted!  But this is such a big project for me – my first proper garden project in fact – that I want to try and document it as much as I can.  I feel like I’ve been my own apprentice up until now, messing about with growing a few veg, sowing some flowers and I’ve been surprised at my own success.  Now I feel like it’s time to graduate up to Assistant Gardener/Trainee Designer!

Work will begin in earnest in a few short weeks but as well as all the indoor planning and a little bit of seed-sowing (sweet peas, delphiniums, astrantia and echinacea are in the propagators as I write) I’ve managed to do a bit of preparation in the garden itself, taking away some of the lawn to widen the borders at each corner, hard pruning of two shrubs (which are either Philadelphus or Deutzia but haven’t flowered for a couple of years so I can’t ID them! Hence the hard pruning…) and I’ve also moved the Monkey Puzzle, as blogged here.  As soon as the weather warms up enough for me to dig a bit more I’ll move some more shrubs into better locations – I want to keep them for structure and because I like most of them, but they need spaced out to make way for interplanting of all those lovely herbaceous perennials and annuals.

A few ‘Before’ photos…

IMG_3945.jpgIMG_3946.jpgIMG_3944.jpg

See – lots of bare soil and potential.  Wish me luck, there’s lots of ground to cover!

And finally some of the stars last year’s trial ‘herbaceous border’…

This slideshow requires JavaScript.


Curly wurly

I’m noticing a certain kind of shape around me at the moment – for the past few days I’ve been spotting curls and twists, exposed I suppose by the bare branches of winter.

IMG_0705.jpg

One that I notice daily is the contorted hazel (Corylus avellana ‘Contorta’which is right outside our back door.  This large shrub is also known as a twisted or corkscrew hazel and by the nickname of ‘Harry Lauder’s walking stick’, after a Scottish entertainer who apparently used to carry a walking stick made from a branch of the shrub.

Only a couple of days ago I was listening to a podcast of Gardener’s Question Time and this plant came up – one of the panellists revealed that the twisted hazel was first discovered by a drunken vicar, who fell into a hedge, looked up and saw the contorted stems.  So he took a cutting, grew the plant and that’s how it’s ended up in many of our gardens (according to Chris Beardshaw!).

It’s a fascinating shrub to look at, but especially in winter, when you can see the exposed shapes of the branches, and then in spring when little yellow catkins appear.  Even its leaves are quite bumpy and textured so it’s well worth having one in the garden for year-round interest.  You can even bring it indoors – sort of.  I’ve pruned a few branches from mine as each year it throws up a few vertically, which is out of keeping with its general weeping shape; so I’ve put the pruned shoots into glass vases so I can admire the twists and turns inside as well as out.

And now it appears I’m being followed by twisted branches… on a visit to the hospital last week to donate blood I noticed a twisted hazel in one of the flower beds in the grounds.

IMG_0723.jpg

It looks quite good with the background of the brighter green conifer.

Then on a walk around the village a few days later, I looked up and noticed these striking trees in someone’s garden:

IMG_0730.jpg
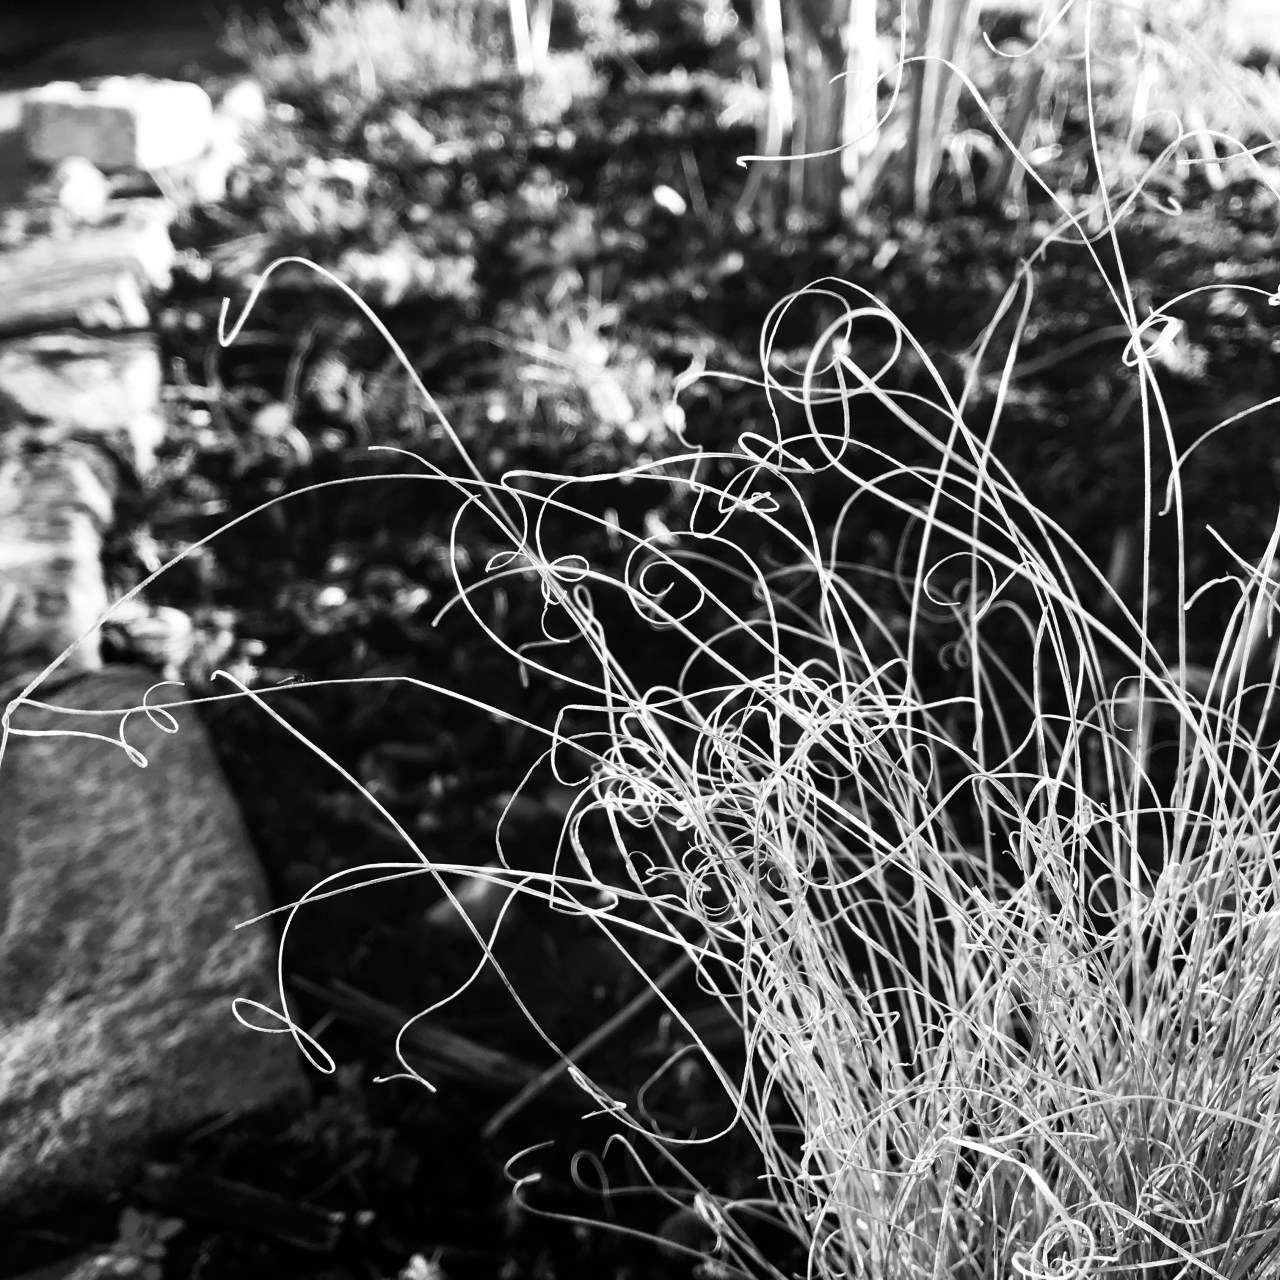
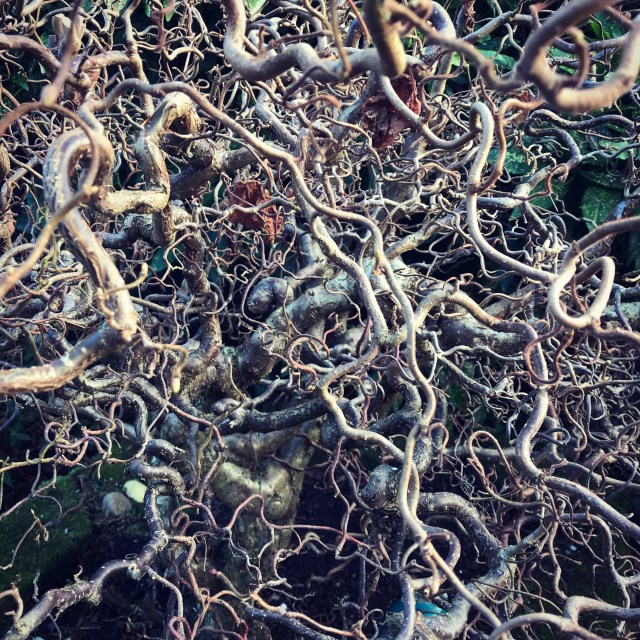
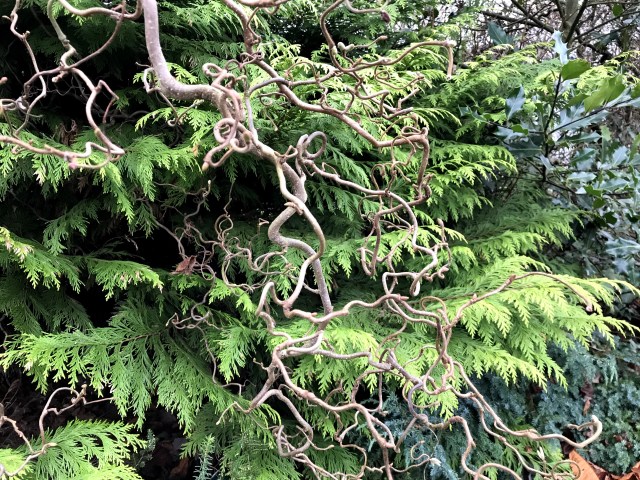
I’m not certain if these are hazel or not – I expect this is the ‘tree’ version of my medium-sized shrub.   I couldn’t get close enough to check but they make a fantastic silhouette against the winter sky.

Finally, one of my favourite little plants in my garden, this little grass…

IMG_0688.jpg

…which is Carex comans ‘Frosted Curls’ and provides a wee corner of interest in its spot in the front garden all year round.  At this time of year its little curls bounce around in the wind and towards the end of last summer it provided a brilliant backdrop for the chocolate cosmos I planted next to it.

20170930-DSC_0120

So there you have it, everything’s a bit twirly at the moment and I like it.  Nature really doesn’t do straight lines and what’s more interesting for your winter garden than a twisty, turny, curly, wurly plant to make you stop and look for a while…


Monkeying around…

I’m really quite pleased with this weekend’s main gardening project – moving my monkey puzzle tree.

Actually I’m really quite pleased to have been in the garden at all – it’s been ages.  Pre-Christmas, Christmas and post-Christmas did not leave much time to get outside and tackle winter gardening jobs, and when there was a bit of spare time the ground was so hard and frosted there wasn’t much point!

So now that we’re back to school/work and in the regular routine, I spent a few hours on my non-working days in the greenhouse and the front garden.  It was so good to get my hands dirty again.  As well as sowing a few seeds in the greenhouse and my new propagator – see below, isn’t she pretty…?

IMG_0725.jpg

This was an early birthday present to myself – a bargain in the Black Friday sales.  It’s currently warming up some astrantia and echinacea seeds – fingers crossed it will do the trick.

Anyway, back to the monkey puzzle.  Moving it is Step 1 of my grand plan for the front garden, which I am attempting to totally redesign.  Previously shrubby and a bit, well, boring, I have already begun removing the most dull/old/overgrown shrubs and last year managed to introduce a few perennials.  This year I will be moving a few plants around, and planting as many perennials as I can get my hands on.   More on the Grand Plan in a later post – back to Step 1.

I wanted to move the monkey puzzle as I had put it to the front corner of the garden after we moved in here.  We acquired it when my youngest daughter was just a few days old so it’s almost 8 now.  It’s done fine and is gradually getting bigger (they grow very slowly for the first 5-10 years) but the branches are growing towards one direction, a bit like arms which are stretching towards you for a hug…but this would be a very bad idea as it’s incredibly prickly.  I think this is because the trees behind are shading it and it’s been growing in the direction it gets most sunlight (west).  So I’m hoping that moving it into the middle will enable it to get a more even tan, so to speak, and might help it to rebalance its direction of growth.

I was a bit nervous about moving a tree which is about seven years old and had been in its current position for about three years, but when I came across Rachel the Gardeners post on this here I was reassured that, with a bit of care, it should survive the transplanting process.  So I dug carefully around it, lifted it with as many roots intact as possible and replaced it into the nice deep hole I dug in the centre* of the front garden.

*Please note my entirely UNscientific method of measuring the centre: pace lengthways across the garden and pace the breadth.  Then take half the number of paces each way and you’re in the middle.  Simples.  I don’t really do measuring.

Et voila – one replanted monkey puzzle tree.

IMG_0754.jpg

I really like it there – it seems to change the whole nature of the front garden.  I guess it’s the addition of a focal point.  So I’m hoping that I can nurture it into its new home and that it will continue to grow and thrive, and that in years to come I can give people directions to my home by telling them ‘we’re the first house as you enter the village – you can’t miss us as there’s a massive monkey puzzle tree slap bang in the middle of the front garden.’

Now for the botanical bit…

Monkey puzzle (Araucaria araucana) originates in Chile, South America and came to Britain in the 1800s.  Its common name derives from this time, when it was very rare to see one.  Apparently Sir William Molesworth, who owned a young specimen at Pencarrow garden in Cornwall was showing it to a friend who remarked “It would puzzle a monkey to climb that”.  The name has stuck – as has the novelty of seeing one in someone’s garden and my own children frequently enjoying shouting ‘MONKEY PUZZLE’ at the top of their voices when we pass one.

Trees can grow more than 12 metres tall, although it will take at least 20 years for it to reach its full height.  They usually bear either male or female cones, although it won’t produce seeds until it is at least 30-40 years old.  It’s thought they can live up to 1000 years.

Bittersweet peas

I’m having a love/hate relationship with sweet peas.

Actually that’s not strictly true – I love them really, but I hate the way they make me sneeze.  I’m growing lots of different varieties this year and although it’s now September and Autumn is definitely peeking its head round the corner, they’re still going strong in my garden.  So I’m bringing in bunches of them every few days – but the pollen is definitely exacerbating my allergies and every morning when I wake up I explode a number of times and end up looking like I’ve been crying for a week.  But that scent though…

I nabbed some photos of the main offenders this morning to ‘review’ the varieties I’ve been growing this year.  Way back in March I treated myself to a window propagator from Marshalls like this one, which came with a selection of new varieties of sweet pea seeds.   I grew a few of each in two batches, one of which was quite late and I guess that’s why I’m still picking them mid-September.

The prize for the most prolific goes to…Little Red Riding Hood:

DSC_0628

This one has been covered in flowers for a number of weeks and is really bright and cheery.  There are so many that I’ve never yet managed to take off every flower with each picking – I’d run out of vases!  The stems are on the short side but if you don’t mind that, this flower just gives and gives the whole season.

The prize for the prettiest colour goes to…Erewhon:

DSC_0610

This flower is such a delicate blue-purple with just a hint of pink.  It’s really gorgeous and very subtle.  Can you spot the aphid in the photo above by the way??

Which brings me to – the prize for the most covered in aphids goes to…Cream Eggs:

DSC_0623

These are also a really pretty colour, with delicate purple veining inside and around the edges, and they smell beautiful.  However, I’ve been chasing aphids off the buds and flowers for several weeks – they hide inside the folds of the flower until you bring them inside and then invade your house too – grrr.

The prize for the most dramatic flower goes to…Berry Kiss: DSC_0618

This has produced lovely deep pink and purple flowers, although these tend to fade quicker and can look a bit tatty after rain.

And the prize for the purest, ruffliest sweet pea goes to…Misty Mountains:

DSC_0608

This mix also has dark and paler purple flowers in it, but I’ve been most struck by the white ones, which look like they’ve fallen straight off an Elizabethan gentleman’s shirt sleeves.  Lovely.

However my favourite sweet pea for this season is a bit of a wild card – it’s a dwarf variety which I planted into a blue pot and set by the front door.  Although it didn’t last as long as the rest, the colour was magical – it’s Northern Lights:

IMG_2165

What a beauty.  The plant has finished flowering but I’ve kept it aside in the hope of keeping some of the seed to sow more next year.

So there you have it, my sweet pea selection.  I’m off to take another antihistamine and enjoy more of one of my favourite flowers in the garden…

DSC_0636

Geranium or pelargonium?

We’re going to talk geraniums and pelargoniums.  I am developing a love for both, however it’s only recently that I’ve discovered I’m calling one of them by the wrong name. I’m learning to tell the difference, and it’s a useful skill because the two types need to be cared for differently.

True geraniums are also known as cranesbill, because of the shape of their seed heads, which look a bit like the long and pointed beak of a crane.  There are many species of geranium – this is one from our garden, fairly typical of the cranesbill I think:

Geranium – possibly ‘Alan Mayes’?

It’s a hardy perennial,  clump-forming, grows well in sun/partial shade and can easily be divided – I have a very large clump of this, which is still a bit too big even though I took away about a third of it in spring to replant on the other side of the border.  You can recognise a cranesbill because of the beak thing, but also by its flowers, which have five petals, all identical.  These grow on individual thin stems which come from from fibrous roots.
And now for pelargoniums.  It’s important to know that these are tender – they don’t grow in cold climates and must be cultivated in a greenhouse and planted out in summer. They’re also sometimes used as houseplants.  There are many different varieties of pelargoniums too and you can also identify them by looking at the petals – there should be five, but the upper two will be a different size and shape to the other three.  They grow on succulent, thick stems, which help to hold moisture during times of drought, which would be typical of their preferred climate – hot and sunny.

pelargoniums

The classic pelargonium: bright red, terracotta pots, hot climate

Both of these plants belong to the family Geraniaceae,  and when pelargoniums were first introduced to Europe from South Africa, it was assumed they were the same.  However when their differences were finally identified in the 1780s, the newcomers were re-classified as pelargoniums.  However, by that time most people were calling them geraniums, and still do.

Interestingly, the name also contains a bird reference; pelargonium derives from the Greek for stork, pelargos.  The seed heads of this plant look at bit like that of a stork, and so these are commonly called storksbill.  They’re also the plants which have that distinctive smell you might recognise – one that makes me think of warm sun, greenhouse glass and green leaves.

So there you have it – a bit of history, botany, Latin and two confusingly similar plants!  As I say, I’ve developed a real fondness for both – I like the tough and resilient geranium/cranesbill and enjoy watching it fill out my borders during the spring, giving a much-need burst of purple.  But I also love the delicate flowers of the pelargonium/storksbill, their scent and the sometimes gaudy leaves.  I acquired one of each recently which are new favourites…

Pelargonium ‘Vancouver Centennial’

Geranium ‘Dusky Crug’ (needs deadheading!)


 …and I’m looking foward to nurturing them over the winter – I don’t mind the extra work necessary by their tender nature.  I’ll happily take cuttings and grow these on under glass to go back out again next summer.

Finally, I must give credit to the book which has been very helpful in writing this post – RHS Latin for Gardeners, which geekily combines many of my loves – gardening, language, Latin, and gorgeous books!

Too busy gardening to blog about gardening!

Which is a good thing, really!  But I have missed writing these updates and sharing the photos and plants which I’ve accumulated in the past couple of weeks.

The weather has, unbelievably, been marvellous – sunny and warm and perfect for getting into the garden and planting out all the seedlings and young plants which have, until now, been crowding the utility/greenhouse, plastic growhouse and my ‘hardening off table’ outside the kitchen door.  Over the past fortnight I’ve planted out marigolds (mostly in the veg garden), cosmos (corner patio), zinnia (in the raised bed with other cut flowers) and filled an enormous hanging basket with lobelia.

The garden’s also filling up with some new additions, thanks to a local church plant sale which was quickly followed by the school summer fair – I managed to pick up about maybe 20 different cuttings and small plants for less than a tenner!  Annoyingly I forgot to photograph them, so I can’t display this triumphant haul, and I have now planted most of them!

They included some crocosmia ‘Lucifer’ which is now in the front borders in between the rhodedendrons to provide some late summer colour.  I’m looking forward to seeing those spring up.  I also picked up some gorgeous little forget-me-nots, which I’ve put into the side patio bed (the plan for this has changed somewhat – but that’s for another post!).    There was a cutting of rosemary, two cornflower plants, some more lobelia and a mystery plant which I’ve put in a pot to see how it will turn out!

I’ve also picked up some new plants at Gardening Scotland – an event in Edinburgh which featured show gardens, plants, floral displays, food and lots and lots of gardening-related equipment for sale.  My mum and I had a great day wandering around and enjoying the sights and scents.  There was a wide variety of plants for sale, most by independent Scottish nurseries, and I found some beautiful, delicate alpines (I love them so much I will also do a separate post on these) and two hydrangea.  I just couldn’t resist the hydrangea, as I have a weakness for these anyway, but also because these were unusual varieties and beautifully coloured.  One is called ‘Popcorn Blue’, basically because it’s blue and looks like popcorn!

So, along with these new additions to the gardening, and thanks to the abundant sunshine, everything is filling out nicely and the garden’s beginning to look properly lush. The nearby trees have obviously filled out and we’re now surrounded by greenery.  I’m spotting young birds visiting frequently and if you pause to listen you can often hear the squeaks and cheeps of a little feathered family nearby.  The starlings are still doing daily raids too – I wonder if they’ll stick around when they’re grown, as we don’t usually get starlings in our garden.

The fruit and veg in the secret garden’s also looking brilliant, but I think this post is long enough and they deserve their own entry!  So, it’s time to get back outside.  I’ll leave you with a few photos of the various plants which are new or are showing off in the garden just now…


A murmuration of starlings

Although there wasn’t much murmuring going on, more like a joyful breakfast cacophony!

We were visited yesterday morning by a little flock of parents and fledglings – a kind of nursery outing if you will.  Some of the babies looked very newly fledged, others were bigger and bolder and all were calling frequently to the parents, who were working hard to pick up insects, worms and the bits of bread which I’d thrown out a few minutes before.

It was fascinating to watch, especially the behaviour of the young birds.  At one point a group of them hijacked my bird table and crowded inside and on top of it, still calling and asking for food, the parents duly delivering a mouthful to the nearest open beak. !

It was almost as if they were trying to recreate the nest – a safe spot where they could huddle up and wait for the next food delivery.

Starlings flock together naturally so it’s not unusual to see these family groups together.  They usually lay 4-6 eggs in the middle of April and the young fledge when they are about three weeks old.  The are only fed for a couple of weeks, until they can fend for themselves.   I feel quite privileged to have viewed this brief stage in the starlings’ lives, it was a quick but joyful visit!

This slideshow requires JavaScript.